WHY THIS HAPPENS? (A1)
Talk about anything related to old versions of Armada.
posted on March 28th, 2016, 5:02 pm
Hi guys!  Sorry If I posted this in wrong section, but it says it's for A1/A2...
Anyway, I asked somepeople on several forums about this issue but I didn't get "solid" answer... So I was working on one ship for A1, it's almost done except one tiny thing..Applied texture don't show properly in Storm3D or in game... I believe the probem is in model/mesh or game itself...texture is fine...
Below you can see how the ship should look; on the left is 3DS Max and on right is Storm3D...
So what could be wrong?? Exact model works in A2 without any problem...
Thank you in advance

Sorry If I posted this in wrong section, but it says it's for A1/A2... Anyway, I asked somepeople on several forums about this issue but I didn't get "solid" answer... So I was working on one ship for A1, it's almost done except one tiny thing..Applied texture don't show properly in Storm3D or in game... I believe the probem is in model/mesh or game itself...texture is fine...
Below you can see how the ship should look; on the left is 3DS Max and on right is Storm3D...
So what could be wrong?? Exact model works in A2 without any problem...
Thank you in advance

posted on May 2nd, 2016, 5:03 pm
I completely forgot about this when you contacted me. Sorry about that.
In case you or anyone else might find this useful:
I can see at least two issues with the model and textures.
1. Texture name uses special characters. Use just the standard character set, with no spaces in file names. If you have multiple languages installed, use the English variant when typing in the file name. I'm not 100% sure that this can cause problems, but just to be on the safe side.
2. The texture UV coordinates are "outside" of the main texture tile. UV coordinates are the positions of each vertex on the texture map.
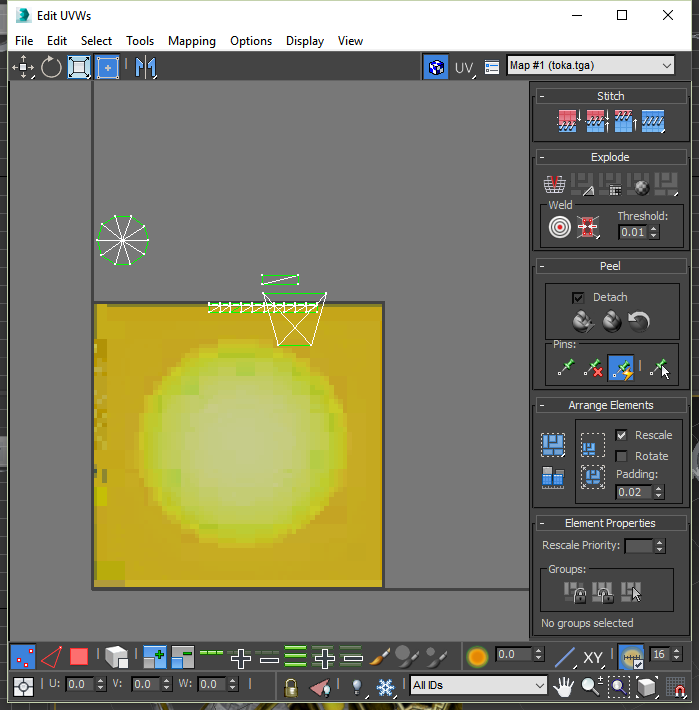
3dsmax will correctly render with this kind of tiled mapping, but armada will snap all UV coordinates to the closest edge. You and up seeing highly distorted textures in armada.
posted on May 2nd, 2016, 6:18 pm
MrVulcan Is there any way to fix that UV mapping to fit in A1??
posted on May 2nd, 2016, 7:04 pm
Absolutely!
You can edit the existing mapping to fit everything onto the main tile. To do this,
1. Select one mesh
2. Go to the "Modify" tab
3. In the "Modifier List", select "Unwrap UVW"
4. Click "Open UV Editor..."
5. Click-drag to select the UV coordinates that are outside of the main tile.
6. Two options:
a. Drag the selection to the main tile
b. Click on the Relative/Absolute toggle in the bottom-left of the UV Editor. Enter 1/-1 in the U/V boxes to shift the selection exactly 1 tile up/down. U: horizontal. V: vertical
7. Once done with all UV coordinates, select the next mesh and repeat.
A few tips:
Scrolling the mouse wheel zooms in/out
Hold+drag with mouse wheel pans the view.
I looked at the UV map and its a bit of a mess. You might even want to remap the whole model. Lots of nice things to learn about 3dsMax from this.
Who is online
Users browsing this forum: No registered users and 4 guests